The weight machine has a partially broken weld. When seated I can feel the seat rock from side to side. Initially I thought the plate screwed to the wood under the cushion was the problem, but it is quite solid. I happened to look under the seat and saw that the weld was cracked. The weld attaches a seat holding pipe to a cross bar. The cracked weld is seen below.
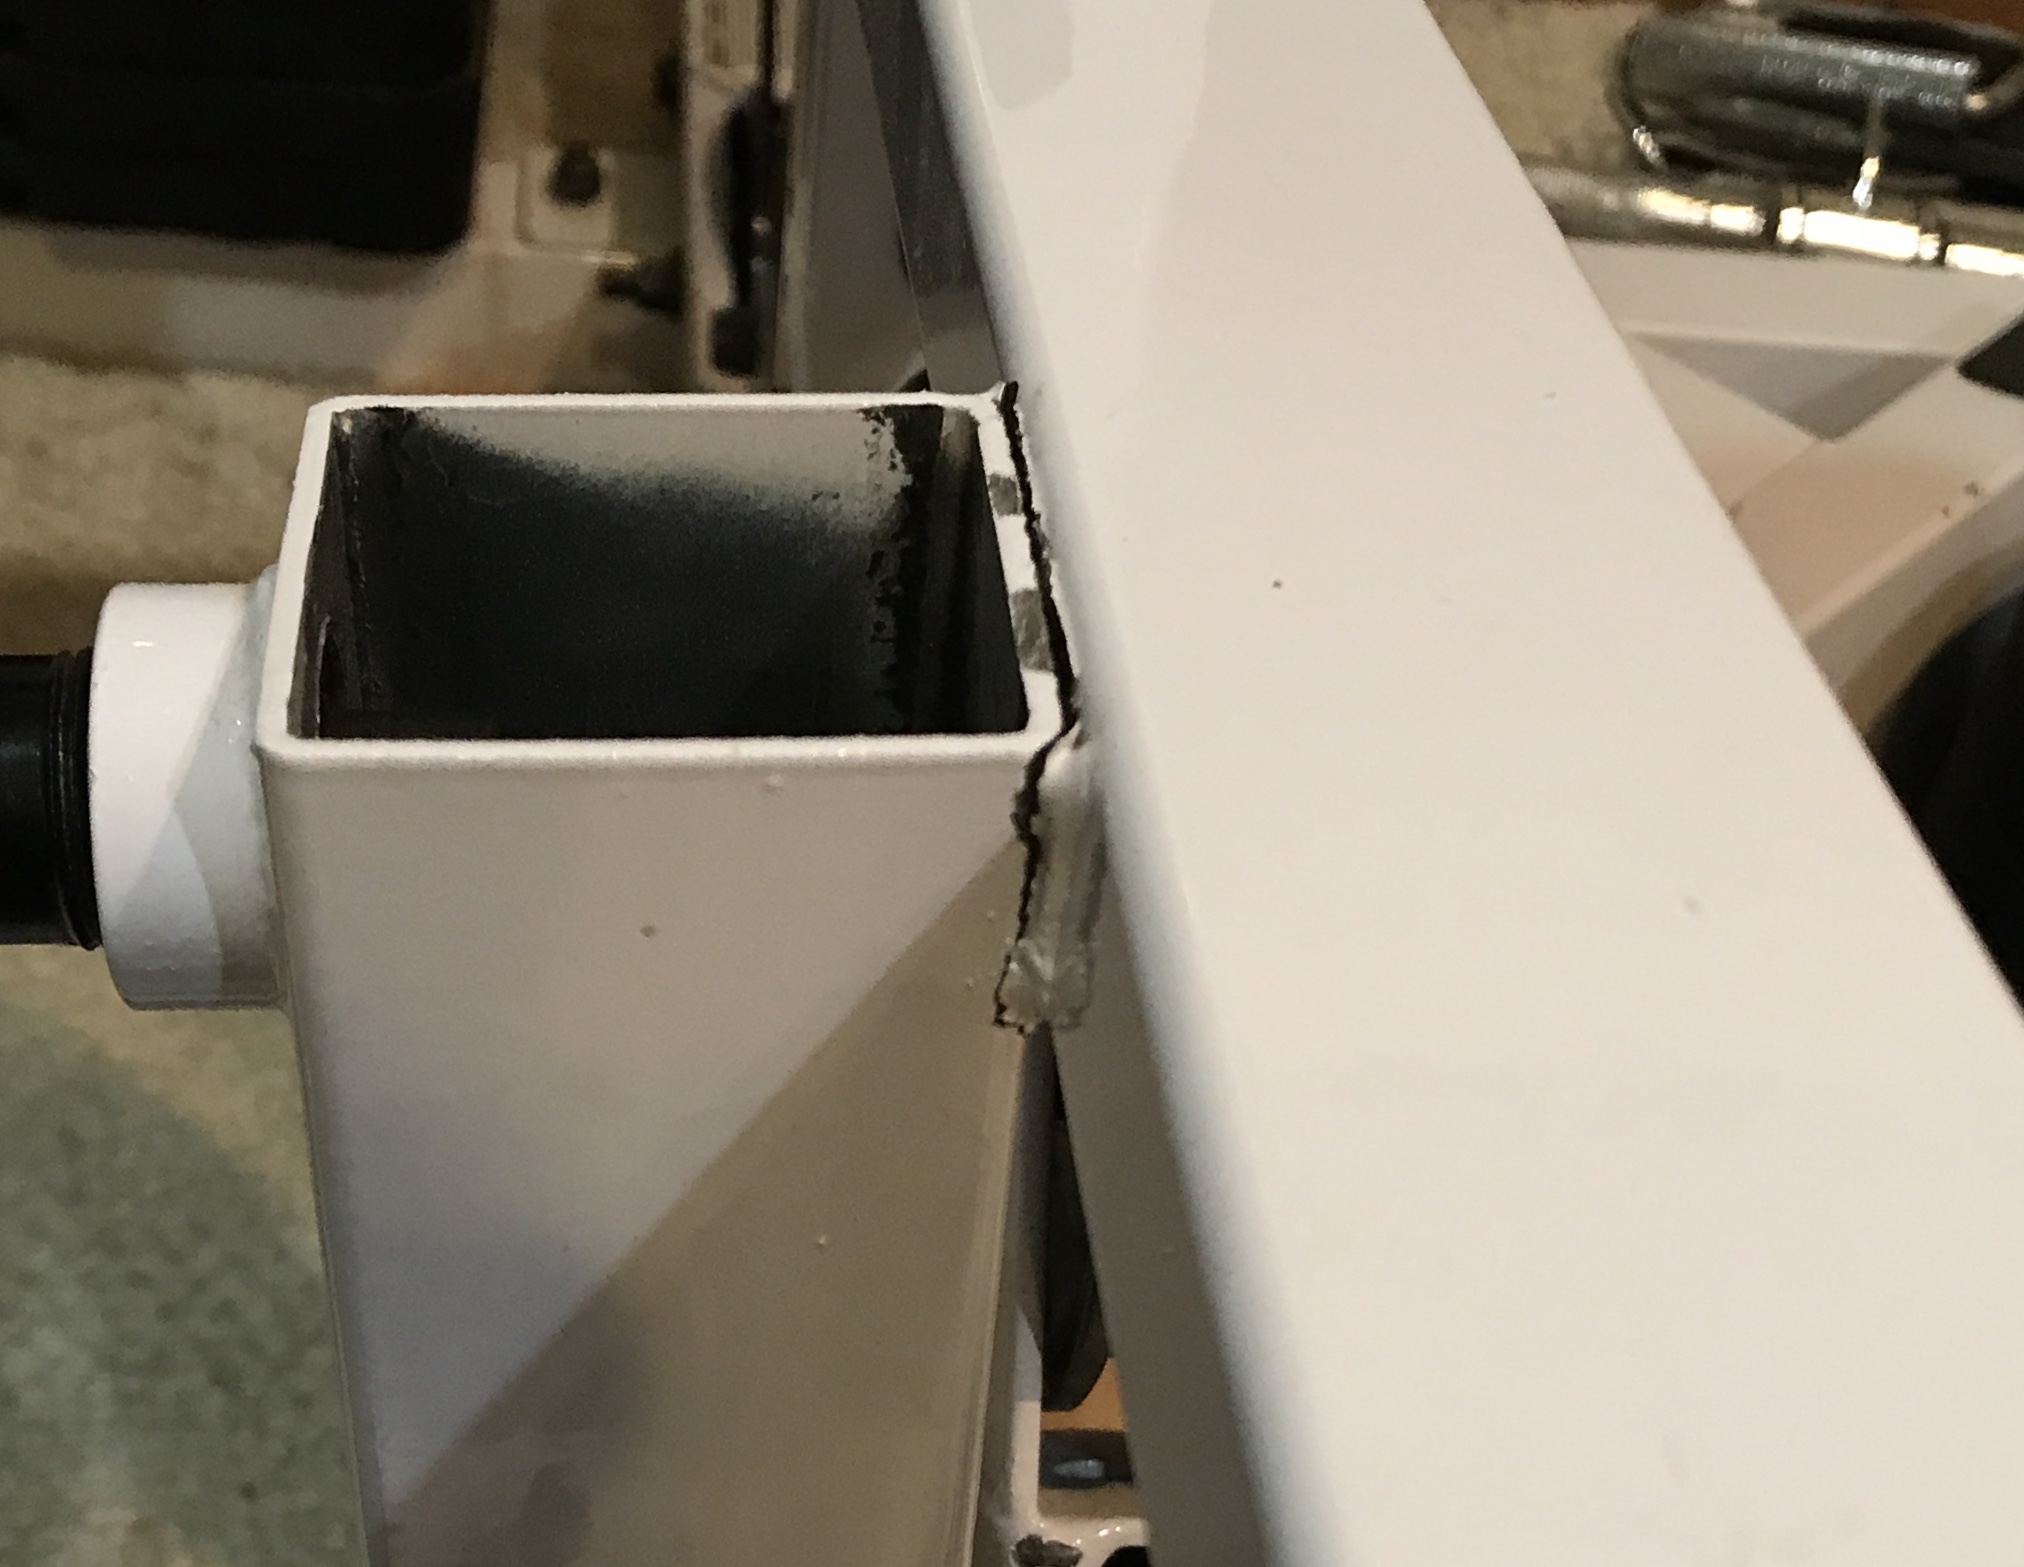
As the picture shows the weld holds a 2" square pipe to a 1" X 2" cross pipe. Since the hole that provides access to the seat post for setting seat height takes up so much space, there was not enough room for clamps. I settled on using a short length of angle iron to provide support. The plan is diagramed below. The angle iron will be bolted to the cross piece with a some padding due to the weld bead. FiberFix will wrap the other side of the angle iron to the seat support pipe.
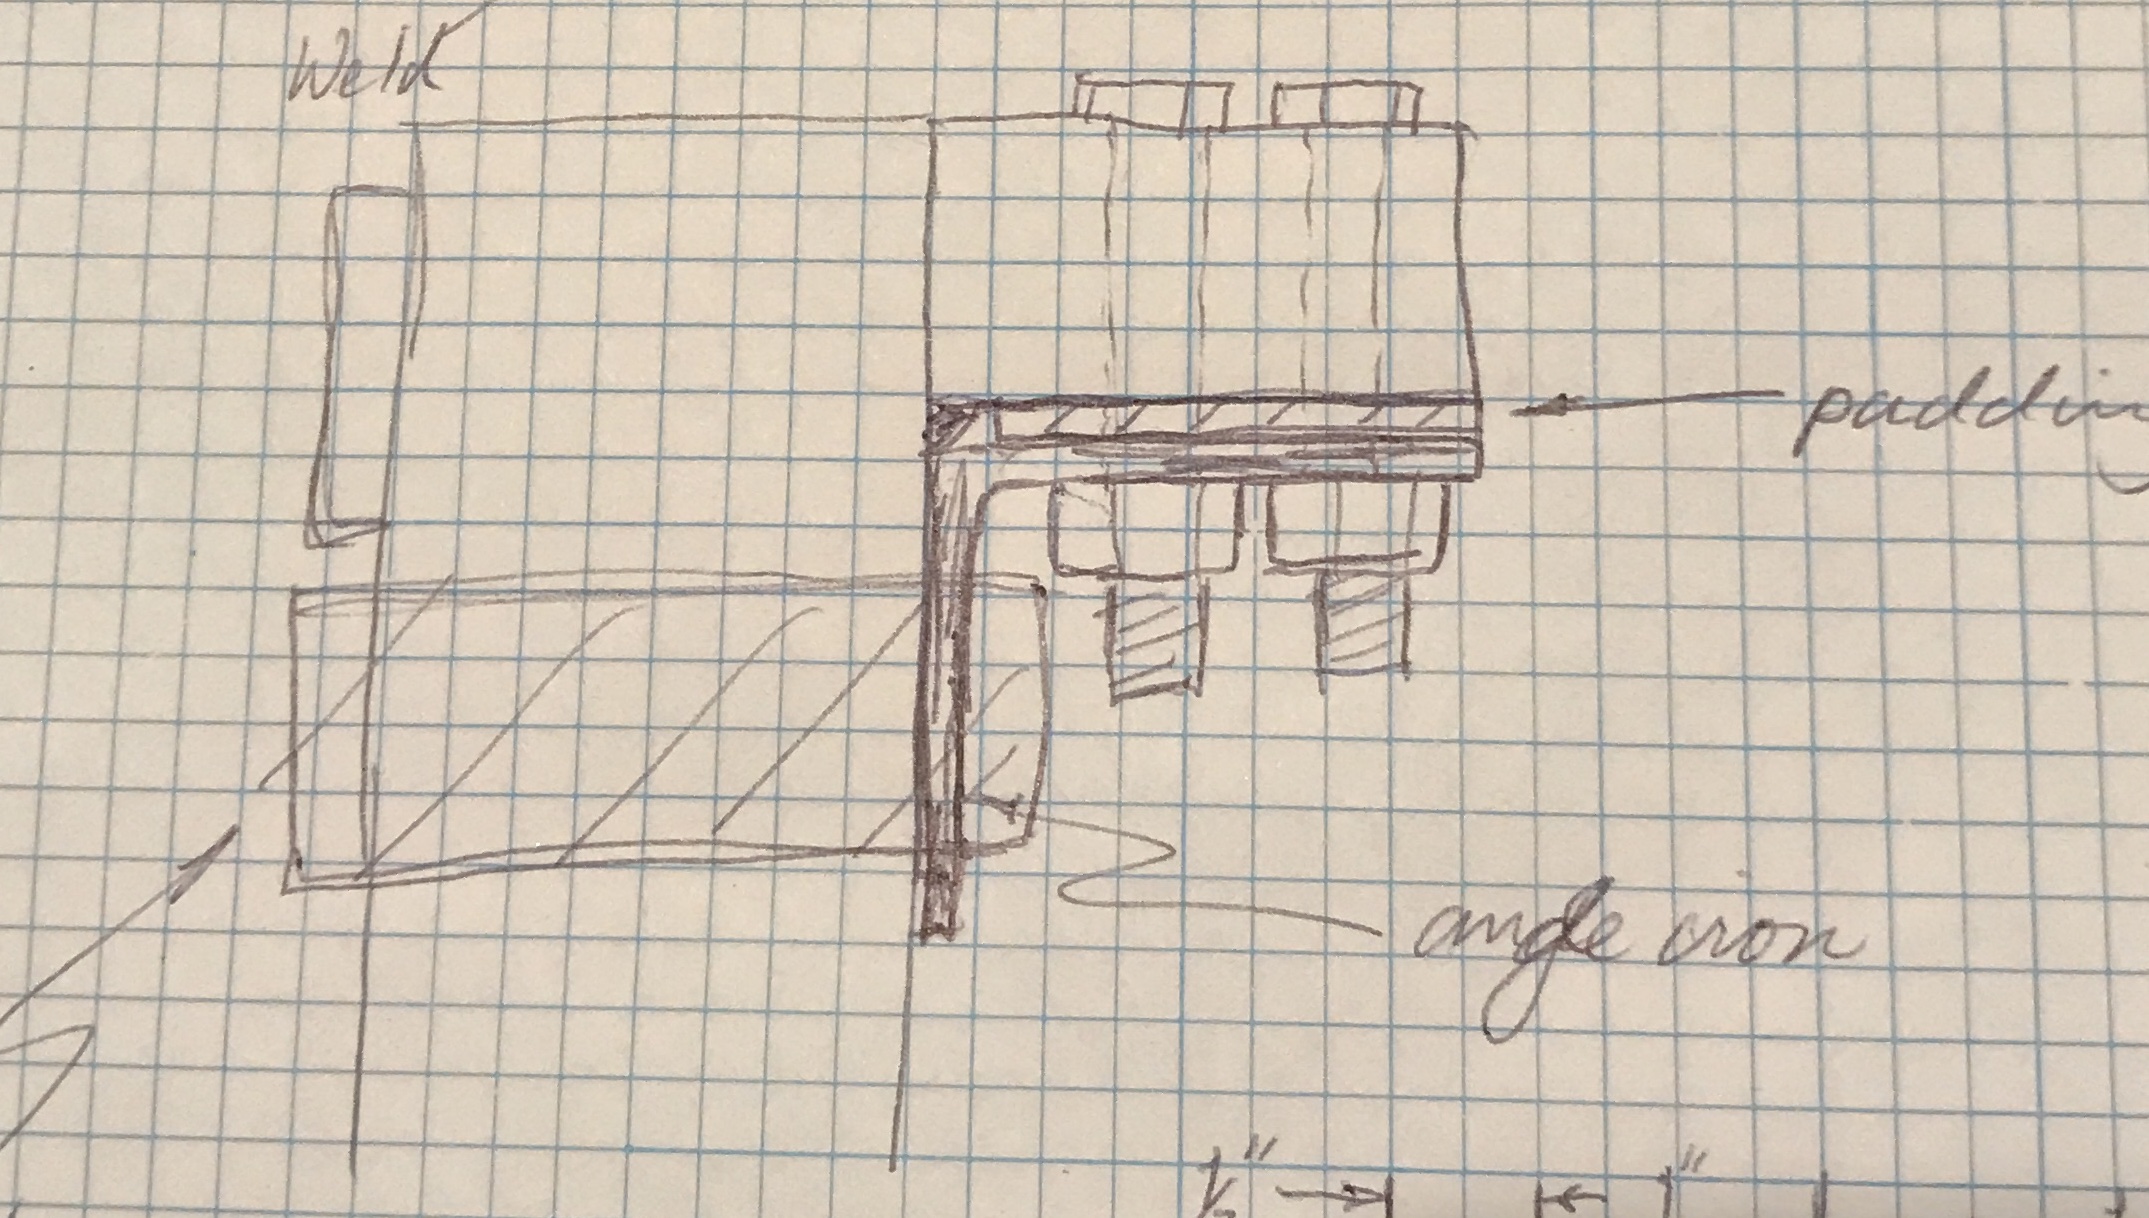
The padding selected was a scrap of 1/8" X 3/4" hot rolled steel. A 1 3/4" length was cut. There was a 1 1/4" width of 2" X 2" angle iron in the scrap. Both were marked for drilling two holes 1" apart. They were centered in both directions on the angle iron, but 1/4" closer to one end of the padding. The holes were then drilled oversize, 9/32", for a 1/4" screw.
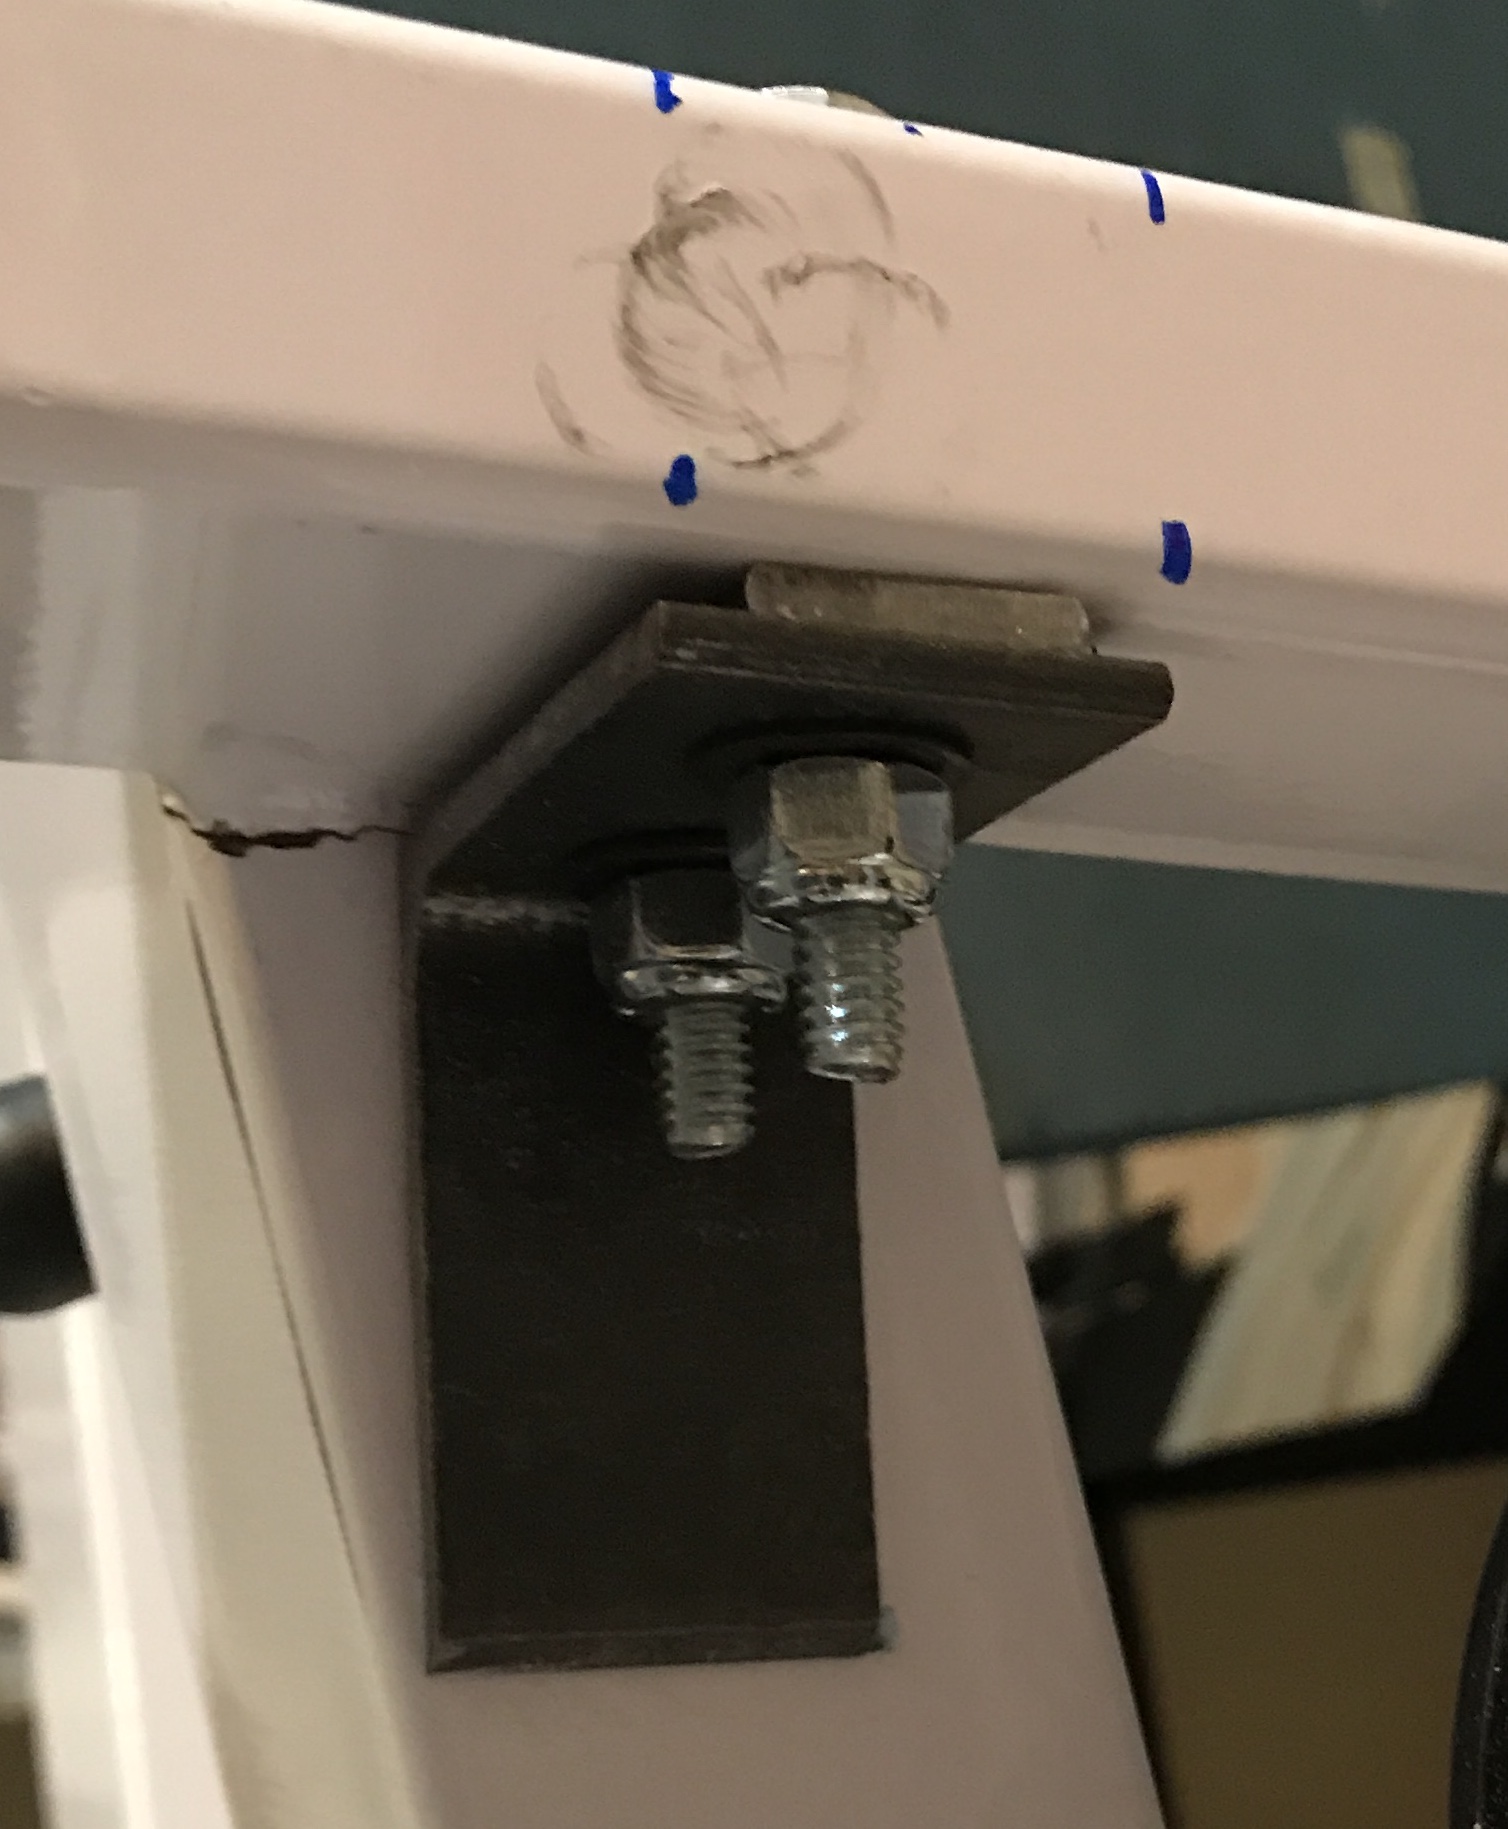
This morning drilling the weight machine was tackled. Plastic sheet was laid under the weight machine to keep most of the crap off the carpet. The angle iron was held in an appropriate position and its sides were marked on the seat support beam. A center line was scratched into the paint. Two lines were scratched into the paint at 90°. One was at 1/2" and one at 1 1/2". The intersections were heavily marked with a punch. The holes were drilled first with a center drill, then through with #28, #4, and 9/32" drills. Of course the battery died after the first hole and the backup had no charge. Cutting fluid was liberally used. This pipe is very gnarly!
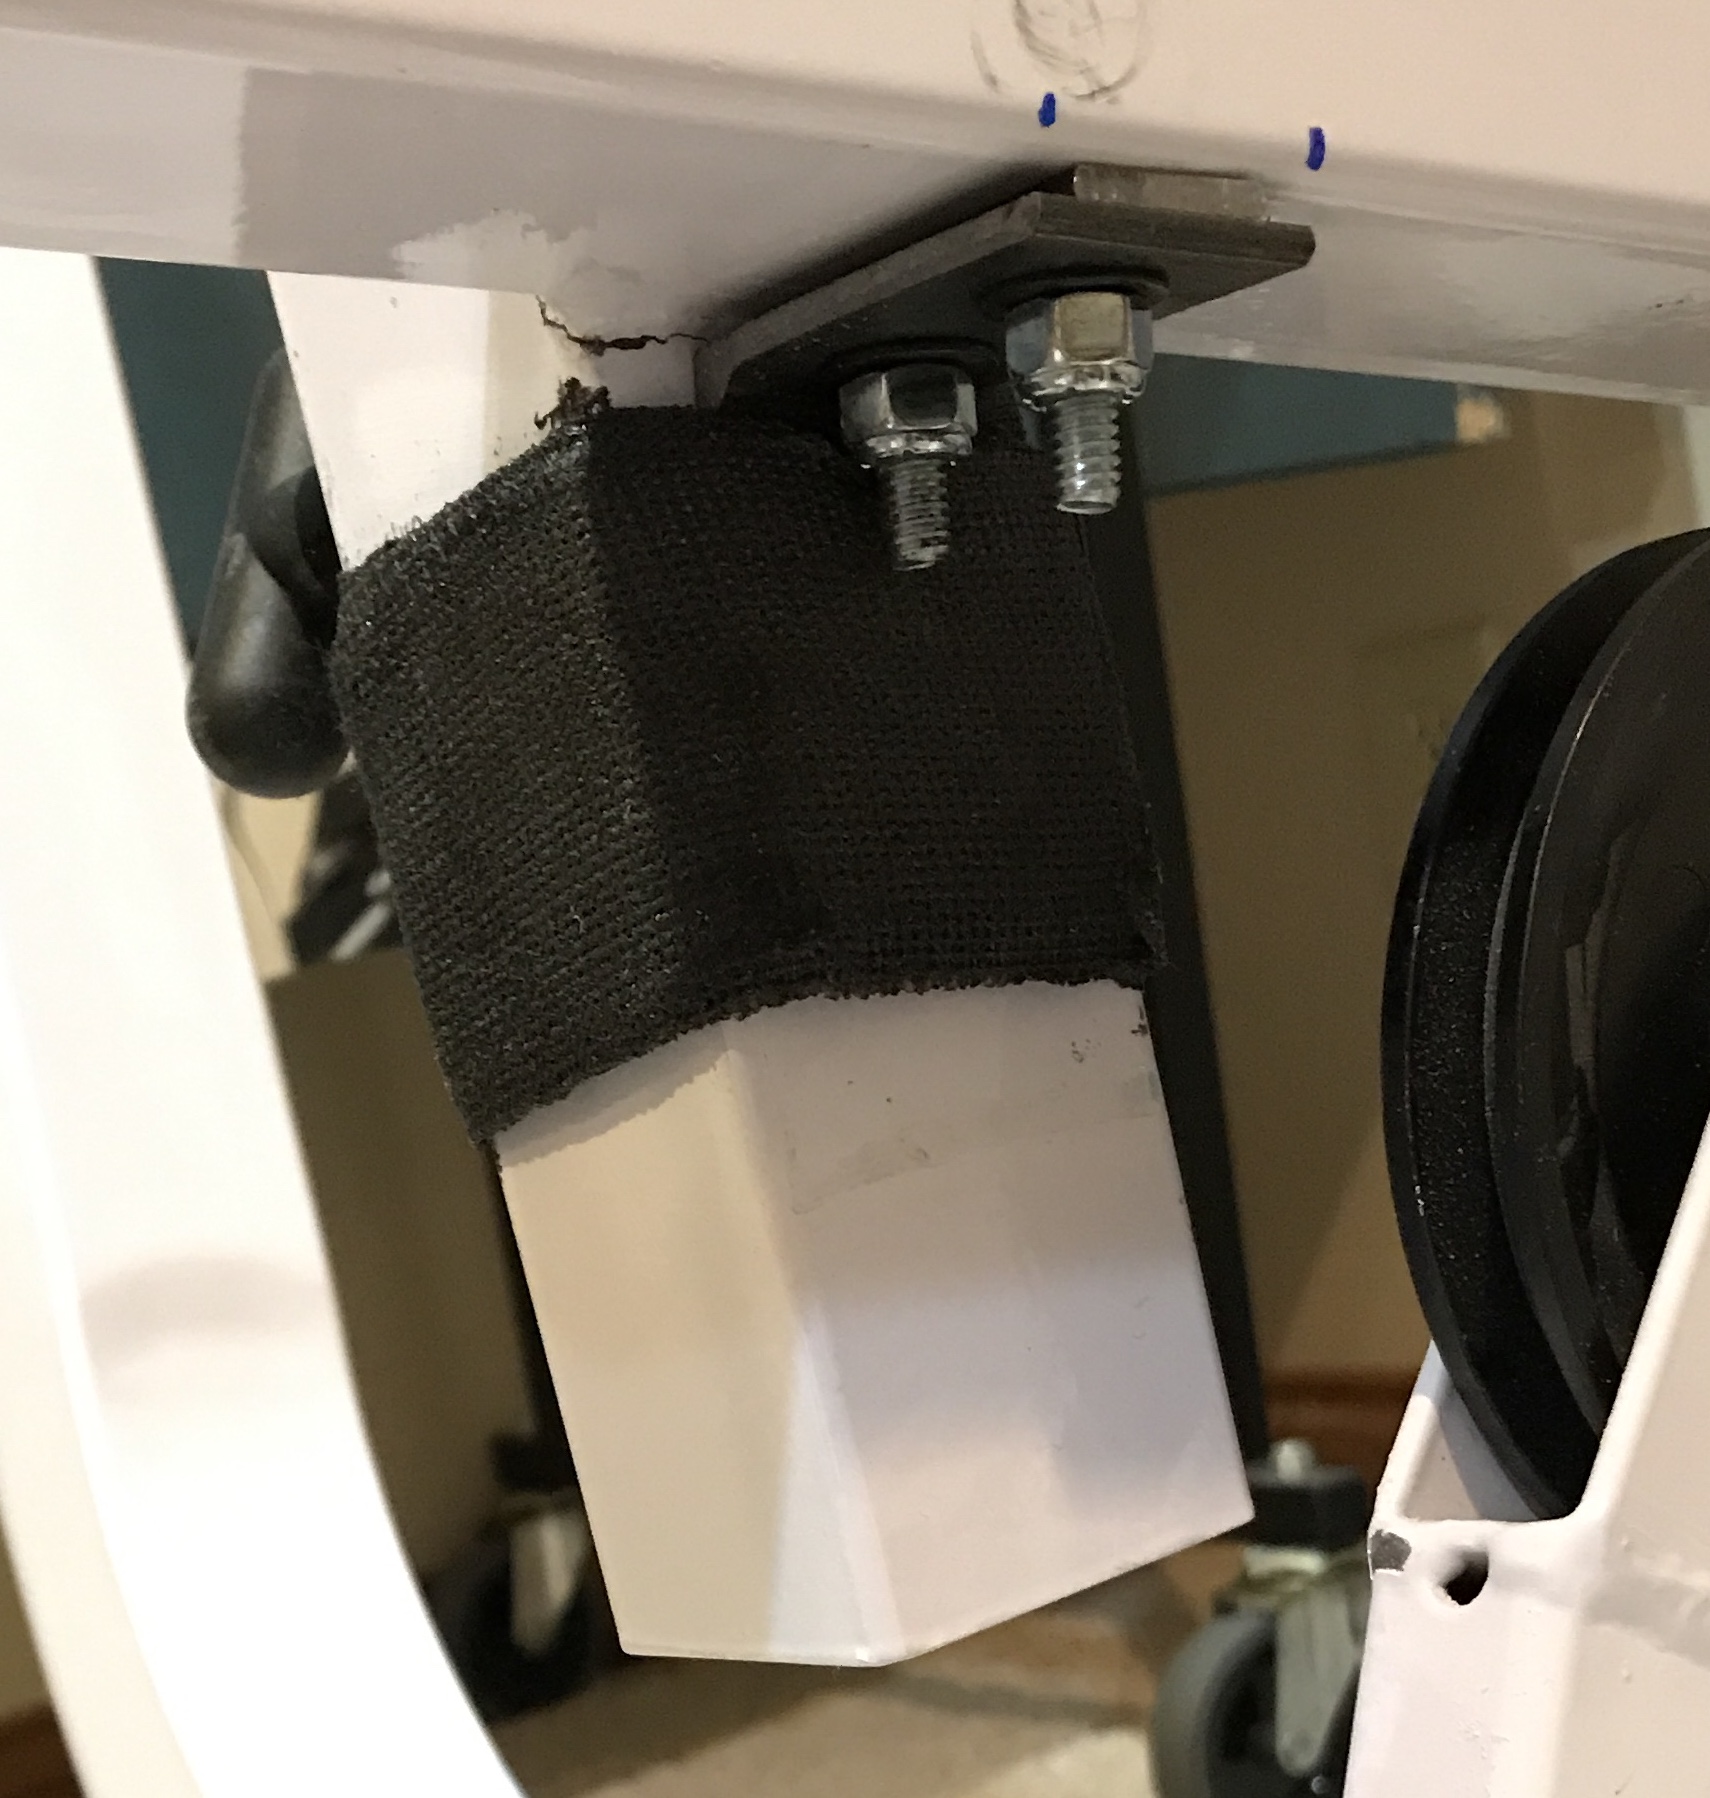
One of the holes in the bracket did not quite align, so it was opened to 5/16". The screws and locking nuts were assembled as seen in the pictures below. The angle iron was pressed so tightly against the seat tube that it did not budge. I was still worried that my weight plus the weight lifted might be too much for this fix, so I got out the FiberFix.

60 Grit sandpaper was used to roughen up the smooth paint on the sides of the tube. A 2" wide role was opened and dipped in water for 12 seconds. It was wound six times tightly around the tube and the angle iron. A special included wrap was further wrapped around the curing FiberFix. It was left to dry for an hour. It should only require 15 minutes, but the air is dry and the temperature is low. The wrap was removed. The picture shows the result. It is hard as a rock as expected. The upper body workout this afternoon provided a good stress test. The seat is solid as a rock.